Tutorial: Creating Dotted Shapes Using Photoshop
I don’t usually create my dotted or dashed lines in Photoshop, I do them in Illustrator because it gives me more control over stroke options. But fret not, you can create nice dotted shapes in Photoshop too. Today we’re gonna learn how to create dotted shapes. You can apply this method to any shape. In today’s example, I’ll walk you through the steps in creating a dotted circle.
Have you created a dotted brush? If not, please follow the Creating Dotted Lines Using Photoshop tutorial. Additionally, you may want to learn how to create
Step 1
Locate the Shape Tool on your tools palette. The default shown is usually Rectangle, but it can be either one of these: Rounded Rectangle, Ellipse, Polygon, Line or Custom Shape. Alternatively, just type “U” on your keyboard.
If the tools palette is not visible, go to the menubar and click Window > Tools.

Step 2
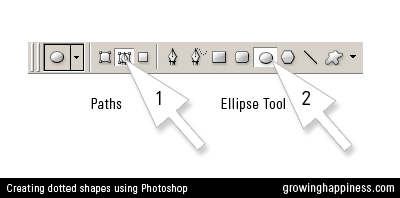
On your Shape options panel, click on the Paths icon (Giant Cursor 1) and then click on the Ellipse Tool icon (Giant Cursor 2).
If you can’t see your Shape options, go to the menubar and click Window > Options.
Step 3
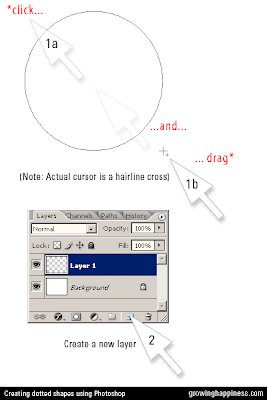
Create a new file and click and drag a circle on to your canvas using the currently selected Path + Ellipse Tool. (Note that your cursor is a small hairline cross, not a Giant Arrow as illustrated here)
After that, create a new layer. If you don’t see your Layers panel, go to Window > Layers. This step is crucial – if you didn’t create a new layer, your working layer will be the Background layer, which, by default, is locked, therefore preventing you from continuing with the next step. You can give the layer a meaningful name e.g. Circle.
Step 4
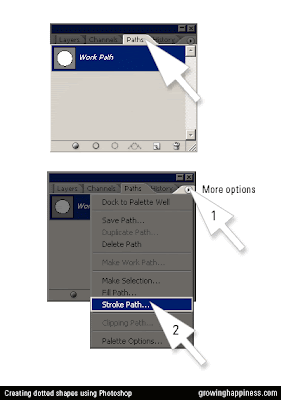
Go to the Paths options palette. If this is not visible, click Window > Paths.
Your Work Path should already be selected (highlighted in blue in this example).
Important: Before proceeding to the next step, please make sure you already have your dotted the brush and correct colors selected. (See Before That… section at the top of this post)
Click on the little arrow at the top right corner to bring out more path options and then click Stroke Path…
Click OK at the dialog box.
Step 5
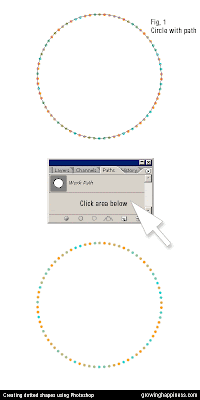
Your circle will look something like Fig. 1.
Click below the Work Path so that it is no longer selected.
Admire your work.
