Tutorial: Creating Dotted Lines Using Photoshop
In this tutorial, we’ll learn how to customize a brush in Adobe® Photoshop® to create dotted lines.

There are a total of 8 images (about 150kb), not including the masthead, in this tutorial.
Step 1
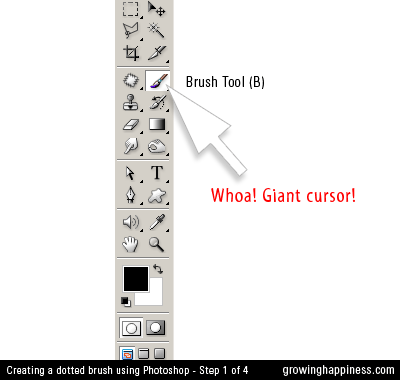
Select the Brush tool from your tools palette, alternatively, just type “B” on your keyboard.
If the tools palette is not visible, go to the menubar and click Window > Tools.
Step 2
With your Brush tool selected, click the “Brush Palette” icon on your Brush Options bar.
Alternatively if you have Brushes in your Dock, you can click on that too.
If your Brush Options bar is not visible, click Window > Options.
The shortcut to bring up your Brush Palette on a PC — simply press F5. 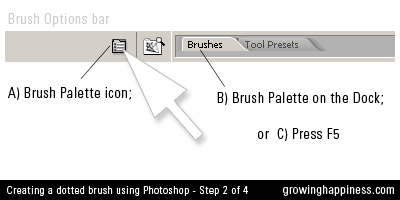
Step 3
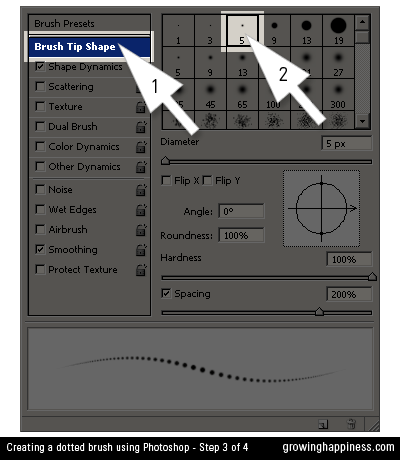
On the Brush Palette box, click on Brush Tip Shape (Giant Cursor 1)
In this example, we’re using a 5-point brush, so click that in the Brush type on the right. (Giant Cursor 2)
Step 4
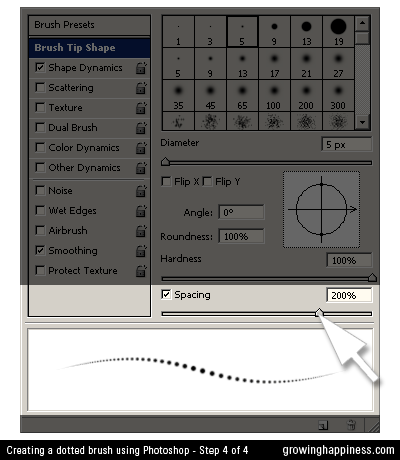
Adjust the spacing by moving the indicator arrow (typically the default is set to 25%). Alternatively, you can type in a number, up to 1000%, directly into the input box. We are using 200% in this example.
The pane below shows you a preview of how your brush stroke will look like.
That’s it! *Applause*
You can now proceed to use your new, fancy spot-drawing brush but if you want to save this style for future use (without going through these steps again and again) follow these additional steps:
Additional Step 1
Click the “Tool Set Picker” on the Brush Options bar.
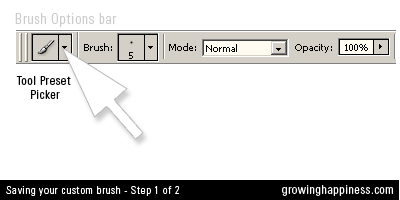
Additional Step 2
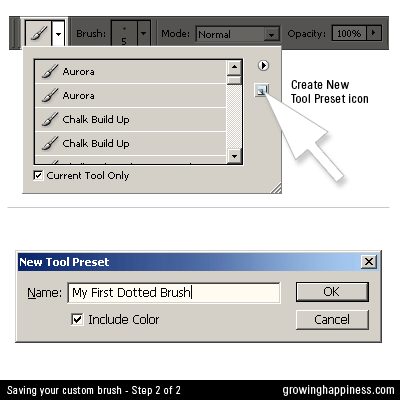
Click on “Create New Tool Preset” icon.
A dialog box will prompt you to enter a new name for your brush.
Enter a meaningful name like, “My Brush 5pt, 200% Space” and click OK.
The next time you want to reuse this brush, just click on the “Tool Set Picker” and click your brush name.
That’s the end of the tutorial.
Now go nuts with dots!
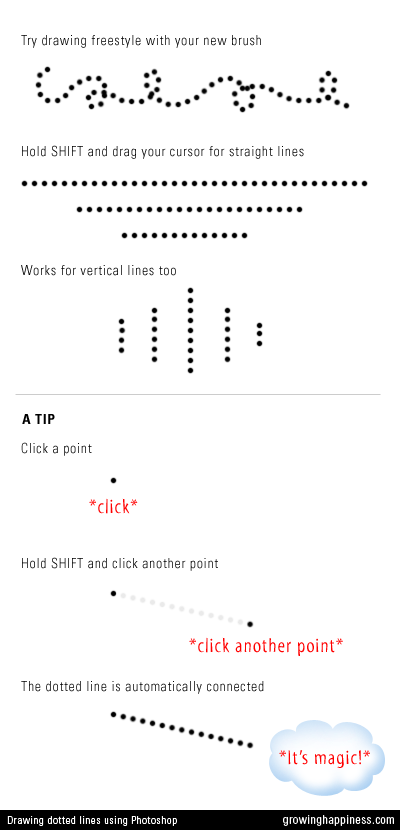

Related Posts:

Tutorial: Colourful Dotted Lines in Photoshop | Growing Happiness at 1:34 am on March 26, 2008
Tutorial: Creating Dotted Shapes Using Photoshop | Growing Happiness at 1:00 pm on April 2, 2008
Stacey at 6:32 pm on March 12, 2009
Ginger M at 11:21 pm on March 22, 2009
Anyone know how to make straight diagonal solid and/or dotted lines? - Digital Scrapbooking Community - DesignerDigitals at 8:42 pm on May 28, 2009




Lady S at 12:40 pm on March 24, 2008