Tutorial: Uploading Images Using WordPress
If you plan to put a badge to your sidebar, you may need to follow through these steps first to get your image URL.
Step 1
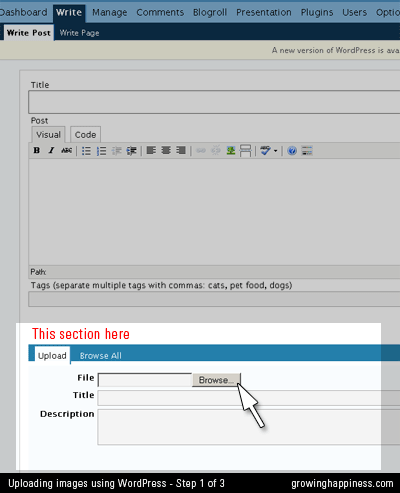
Go to a Write Page or Write Post page.
Locate the “Upload” section below.
Select the saved image from your computer, give it a title and description if you want, and click the “Upload” button.
Step 2
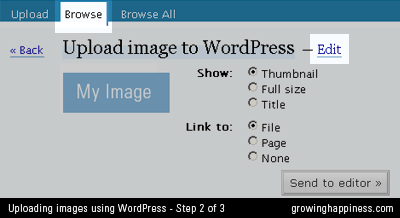
(Usually, if you want to use the image you’ve just uploaded in a post that you’re writing, you’d click “Send to Editor”. In this tutorial, I’m showing you how to get the image URL so that you can use it on your sidebar)
Go to the “Browse” mode, click on “Edit”.
Alternatively click “Browse All”, select the image you want to use, and then click on “Edit”.
Step 3
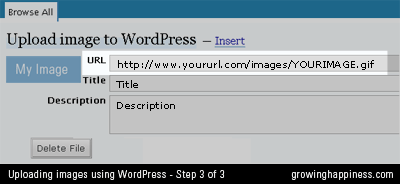
Copy your image URL from the URL field. Paste it in a Notepad program so that you can use it later.
Now you can proceed to use this image in your sidebar by following this tutorial.
Remember you can download a badge from this page.
Related Posts:




Tutorial: Adding Badges Using WordPress | Growing Happiness at 1:23 am on April 4, 2008